介紹如何在 Python 中使用 matplotlib 的 mplot3d 工具組繪製各種 3D 圖形。
Jupyter 環境設定
若在 Jupyter 或 JupyterLab 環境中,除了安裝好 matplotlib 模組之外,建議也安裝 ipympl,可讓 Jupyter 在網頁中呈現互動式的圖形,對於分析 3D 資料非常有用。
# 安裝 ipympl
sudo pip3 install ipympl

# 安裝 jupyterlab-manager
sudo jupyter labextension install @jupyter-widgets/jupyterlab-manager

# 重新建置 JupyterLab
sudo jupyter lab build
3D 座標點
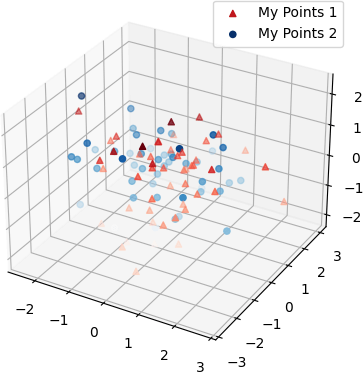
在三維空間中繪製座標點是最常用到的基本功能。
%matplotlib widget
import numpy as np
import matplotlib.pyplot as plt

# 建立 3D 圖形
fig = plt.figure()
ax = fig.gca(projection='3d')

# 產生 3D 座標資料
z1 = np.random.randn(50)
x1 = np.random.randn(50)
y1 = np.random.randn(50)
z2 = np.random.randn(50)
x2 = np.random.randn(50)
y2 = np.random.randn(50)

# 繪製 3D 座標點
ax.scatter(x1, y1, z1, c=z1, cmap='Reds', marker='^', label='My Points 1')
ax.scatter(x2, y2, z2, c=z2, cmap='Blues', marker='o', label='My Points 2')

# 顯示圖例
ax.legend()

# 顯示圖形
plt.show()
3D 曲線
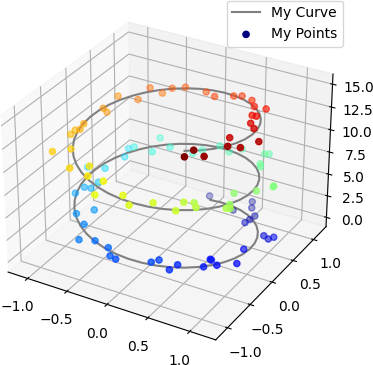
這是將 3D 的曲線與座標點畫在同一張圖的範例。
%matplotlib widget
import numpy as np
import matplotlib.pyplot as plt

# 建立 3D 圖形
fig = plt.figure()
ax = fig.gca(projection='3d')

# 產生 3D 座標資料
z = np.linspace(0, 15, 100)
x = np.sin(z)
y = np.cos(z)

# 繪製 3D 曲線
ax.plot(x, y, z, color='gray', label='My Curve')

# 產生 3D 座標資料
x2 = np.sin(z) + 0.1 * np.random.randn(100)
y2 = np.cos(z) + 0.1 * np.random.randn(100)

# 繪製 3D 座標點
ax.scatter(x2, y2, z, c=z, cmap='jet', label='My Points')

# 顯示圖例
ax.legend()

# 顯示圖形
plt.show()
Wireframe 圖形
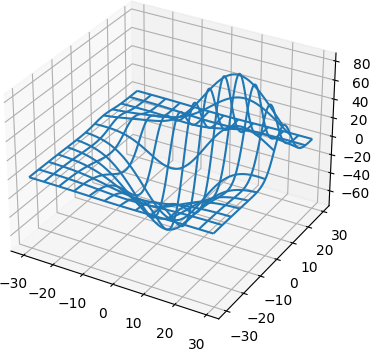
這是 3D 的 wireframe 網格圖形範例。
%matplotlib widget
from mpl_toolkits.mplot3d import axes3d
import matplotlib.pyplot as plt

# 建立 3D 圖形
fig = plt.figure()
ax = fig.gca(projection='3d')

# 產生測試資料
X, Y, Z = axes3d.get_test_data(0.05)

# 繪製 Wireframe 圖形
ax.plot_wireframe(X, Y, Z, rstride=10, cstride=10)

# 顯示圖形
plt.show()
3D 曲面
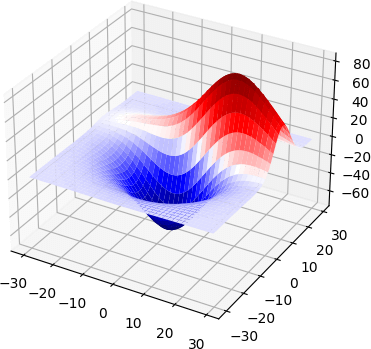
這是繪製 3D 曲面的範例。
%matplotlib widget
from mpl_toolkits.mplot3d import axes3d
import matplotlib.pyplot as plt

# 建立 3D 圖形
fig = plt.figure()
ax = fig.gca(projection='3d')

# 產生測試資料
X, Y, Z = axes3d.get_test_data(0.05)

# 繪製 3D 曲面圖形
ax.plot_surface(X, Y, Z, cmap='seismic')

# 顯示圖形
plt.show()
3D 向量場
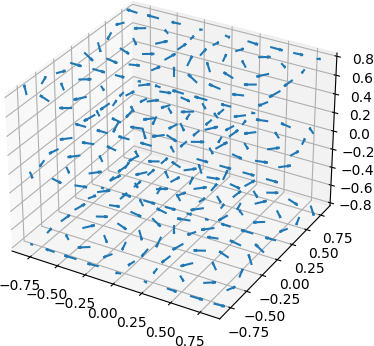
這是繪製 3D 向量場(vector field)的範例。
import matplotlib.pyplot as plt
import numpy as np

# 建立 3D 圖形
fig = plt.figure()
ax = fig.gca(projection='3d')

# 產生格點資料
x, y, z = np.meshgrid(np.arange(-0.8, 1, 0.2),
                      np.arange(-0.8, 1, 0.2),
                      np.arange(-0.8, 1, 0.8))

# 產生向量場資料
u = np.sin(np.pi * x) * np.cos(np.pi * y) * np.cos(np.pi * z)
v = -np.cos(np.pi * x) * np.sin(np.pi * y) * np.cos(np.pi * z)
w = (np.sqrt(2.0 / 3.0) * np.cos(np.pi * x) * np.cos(np.pi * y) *
     np.sin(np.pi * z))

# 繪製向量場
ax.quiver(x, y, z, u, v, w, length=0.1, normalize=True)

# 顯示圖形
plt.show()
在 matplotlib 的官方文件中還有非常多其他類型的 3D 圖形範例可以參考。

