介紹如何使用 Python 的 pywin32 模組操控 Excel。
如果想在 Windows 中使用 Python 程式操控 Excel,可以使用 pywin32 這個 Python 模組,使用前先依照步驟安裝 pywin32 模組。
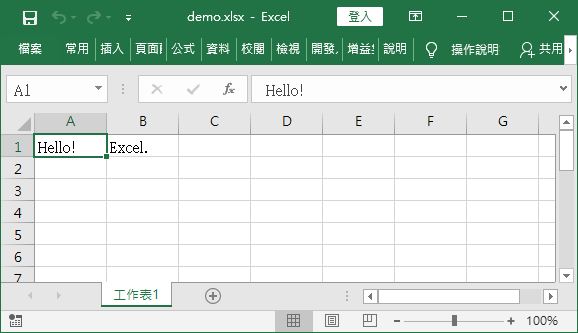
以下這個範例是使用 Python 操控 Excel,新增一個 Excel 活頁簿,並將資料寫入工作表,最後存檔離開。
import win32com.client

# 取得 Excel COMObject
excel = win32com.client.Dispatch('Excel.Application')

# 顯示視窗
excel.Visible = True

# 新增活頁簿
newBook = excel.Workbooks.Add()

# 取得目前的工作表
sheet = newBook.ActiveSheet

# 寫入資料
sheet.Cells(1, 1).Value = "Hello!"
sheet.Cells(1, 2).Value = "Excel."

# 儲存檔案
newBook.SaveAs("C:OfficeGuidedemo.xlsx")

# 關閉活頁簿
newBook.Close()

# 離開 Excel
excel.Application.Quit()
執行這段程式碼之後,就會建立一個檔名為 demo.xlsx 的 Excel 檔案。
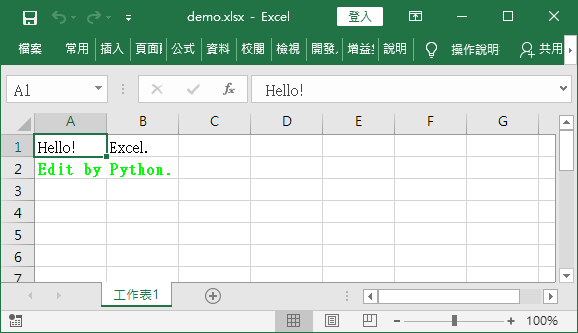
以下是使用 Python 開啟上一個範例產生的 Excel 檔案,更改內容、文字顏色、字體的範例:
import win32com.client

# 取得 Excel COMObject
excel = win32com.client.Dispatch('Excel.Application')

# 顯示視窗
excel.Visible = True

# 開啟 Excel
myBook = excel.Workbooks.Open("C:OfficeGuidedemo.xlsx")

# 取得指定的工作表(可用索引或名稱)
sheet = myBook.Worksheets(1)
#sheet = myBook.Worksheets("我的工作表")

# 讀取資料
content = sheet.Cells(1, 1).Value
print(content)

# 寫入資料
sheet.Cells(2, 1).Value = "Edit by Python."

# 將文字設定為綠色
sheet.Cells(2, 1).Font.Color = 0x00FF00

# 將文字設定為粗體
sheet.Cells(2, 1).Font.Bold = True

# 設定文字字型
sheet.Cells(2, 1).Font.Name = "微軟雅黑"

# 儲存檔案
myBook.Save

# 關閉活頁簿
myBook.Close()

# 離開 Excel
excel.Application.Quit()
編輯之後的 Excel 檔案會像這樣:
參考資料:itread01、子風的知識庫、pythonlibrary