本篇介紹如何在 Python 中使用 NiBabel 或 SimpleITK 模組讀取並顯示 NIfTI 影像(.nii、.nii.gz)。
NiBabel 是一個專門用於處理醫學與神經影像的模組,對於 NIfTI 影像格式支援度非常好,而 SimpleITK 則是通用型的影像處理模組,可以在讀取 NIfTI 影像之後,進行各種後續分析。這兩套工具都可以用來查看 NIfTI 影像,以下是操作教學。
NiBabel 可以直接以 pip 安裝:
# 安裝 NiBabel 模組
pip install nibabel
在 NiBabel 模組中附帶了一些範例影像檔,以下示範讀取 NIfTI 1 影像檔案的方式:
import os
import nibabel as nib
from nibabel.testing import data_path

# 取得 NIfTI 1 範例影像路徑
example_ni1 = os.path.join(data_path, 'example4d.nii.gz')

# 載入 NIfTI 1 範例影像
n1_img = nib.load(example_ni1)
NIfTI 1 的標頭長度為 352 位元組,包含以下欄位:
# 顯示 NIfTI 1 範例影像標頭資訊
print(n1_img.header)
<class 'nibabel.nifti1.Nifti1Header'> object, endian='<'
sizeof_hdr      : 348
data_type       : b''
db_name         : b''
extents         : 0
session_error   : 0
regular         : b'r'
dim_info        : 57
dim             : [  4 128  96  24   2   1   1   1]
intent_p1       : 0.0
intent_p2       : 0.0
intent_p3       : 0.0
intent_code     : none
datatype        : int16
bitpix          : 16
slice_start     : 0
pixdim          : [-1.000000e+00  2.000000e+00  2.000000e+00  2.199999e+00  2.000000e+03
  1.000000e+00  1.000000e+00  1.000000e+00]
vox_offset      : 0.0
scl_slope       : nan
scl_inter       : nan
slice_end       : 23
slice_code      : unknown
xyzt_units      : 10
cal_max         : 1162.0
cal_min         : 0.0
slice_duration  : 0.0
toffset         : 0.0
glmax           : 0
glmin           : 0
descrip         : b'FSL3.3\x00 v2.25 NIfTI-1 Single file format'
aux_file        : b''
qform_code      : scanner
sform_code      : scanner
quatern_b       : -1.9451068e-26
quatern_c       : -0.9967085
quatern_d       : -0.08106874
qoffset_x       : 117.8551
qoffset_y       : -35.722942
qoffset_z       : -7.2487984
srow_x          : [-2.0000000e+00  6.7147157e-19  9.0810245e-18  1.1785510e+02]
srow_y          : [-6.7147157e-19  1.9737115e+00 -3.5552824e-01 -3.5722942e+01]
srow_z          : [ 8.2554809e-18  3.2320762e-01  2.1710818e+00 -7.2487984e+00]
intent_name     : b''
magic           : b'n+1'
NIfTI 2 影像檔案的讀取方式也都相同:
# 取得 NIfTI 2 範例影像路徑
example_ni2 = os.path.join(data_path, 'example_nifti2.nii.gz')

# 載入 NIfTI 2 範例影像
n2_img = nib.load(example_ni2)
NIfTI 2 的標頭長度為 540 位元組,但欄位數量較少:
# 顯示 NIfTI 2 範例影像標頭資訊
print(n2_img.header)
<class 'nibabel.nifti2.Nifti2Header'> object, endian='<'
sizeof_hdr      : 540
magic           : b'n+2'
eol_check       : [13 10 26 10]
datatype        : int16
bitpix          : 16
dim             : [ 4 32 20 12  2  1  1  1]
intent_p1       : 0.0
intent_p2       : 0.0
intent_p3       : 0.0
pixdim          : [-1.00000000e+00  2.00000000e+00  2.00000000e+00  2.19999909e+00
  2.00000000e+03  1.00000000e+00  1.00000000e+00  1.00000000e+00]
vox_offset      : 0
scl_slope       : nan
scl_inter       : nan
cal_max         : 1162.0
cal_min         : 0.0
slice_duration  : 0.0
toffset         : 0.0
slice_start     : 0
slice_end       : 23
descrip         : b'FSL3.3\x00 v2.25 NIfTI-1 Single file format'
aux_file        : b''
qform_code      : scanner
sform_code      : scanner
quatern_b       : -1.9451068140294884e-26
quatern_c       : -0.9967085123062134
quatern_d       : -0.0810687392950058
qoffset_x       : 117.8551025390625
qoffset_y       : -35.72294235229492
qoffset_z       : -7.248798370361328
srow_x          : [-2.00000000e+00  6.71471565e-19  9.08102451e-18  1.17855103e+02]
srow_y          : [-6.71471565e-19  1.97371149e+00 -3.55528235e-01 -3.57229424e+01]
srow_z          : [ 8.25548089e-18  3.23207617e-01  2.17108178e+00 -7.24879837e+00]
slice_code      : unknown
xyzt_units      : 10
intent_code     : none
intent_name     : b''
dim_info        : 57
unused_str      : b''
顯示影像之前,先查看一下影像的大小:
# 查看影像尺寸
print(n1_img.dataobj.shape)
(128, 96, 24, 2)
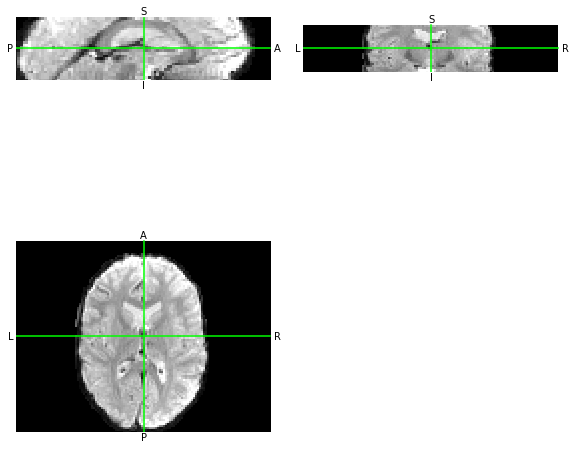
若要顯示 3D 影像各軸的切面,可以使用 OrthoSlicer3D:
from nibabel.viewers import OrthoSlicer3D

# 建立 OrthoSlicer3D Viewer 物件
osViewer = OrthoSlicer3D(n1_img.dataobj[:,:,:,0])

# 設定三軸的切面位置
osViewer.set_position(64, 48, 12)

# 顯示三軸切面
osViewer.show()
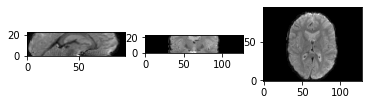
另一種方式是使用 matplotlib 來繪製切面圖,效果都差不多:
import matplotlib.pyplot as plt

# 繪製多張切面圖
def show_slices(slices):
    fig, axes = plt.subplots(1, len(slices))
    for i, slice in enumerate(slices):
        axes[i].imshow(slice.T, cmap="gray", origin="lower")

# 建立各軸切面
slice0 = n1_img.dataobj[64, :, :, 0]
slice1 = n1_img.dataobj[:, 48, :, 0]
slice2 = n1_img.dataobj[:, :, 12, 0]

# 顯示各軸切面
show_slices([slice0, slice1, slice2])
SimpleITK 可以直接以 pip 安裝:
# 安裝 SimpleITK 模組
pip install SimpleITK
SimpleITK 可以使用其 ReadImage 直接讀取 NIfTI 影像,這裡我們沿用上面 NiBabel 模組的 NIfTI 範例影像:
import SimpleITK as sitk

# 使用 SimpleITK 讀取
n1_img2 = sitk.ReadImage(example_ni1)

# 轉為 NumPy 陣列
n1_img_arr = sitk.GetArrayFromImage(n1_img2)

# 查看影像尺寸
print(n1_img_arr.shape)
(128, 96, 24, 2)
使用 SimpleITK 讀取出來的影像維度排列順序跟 NiBabel 不同,在處理上要注意。
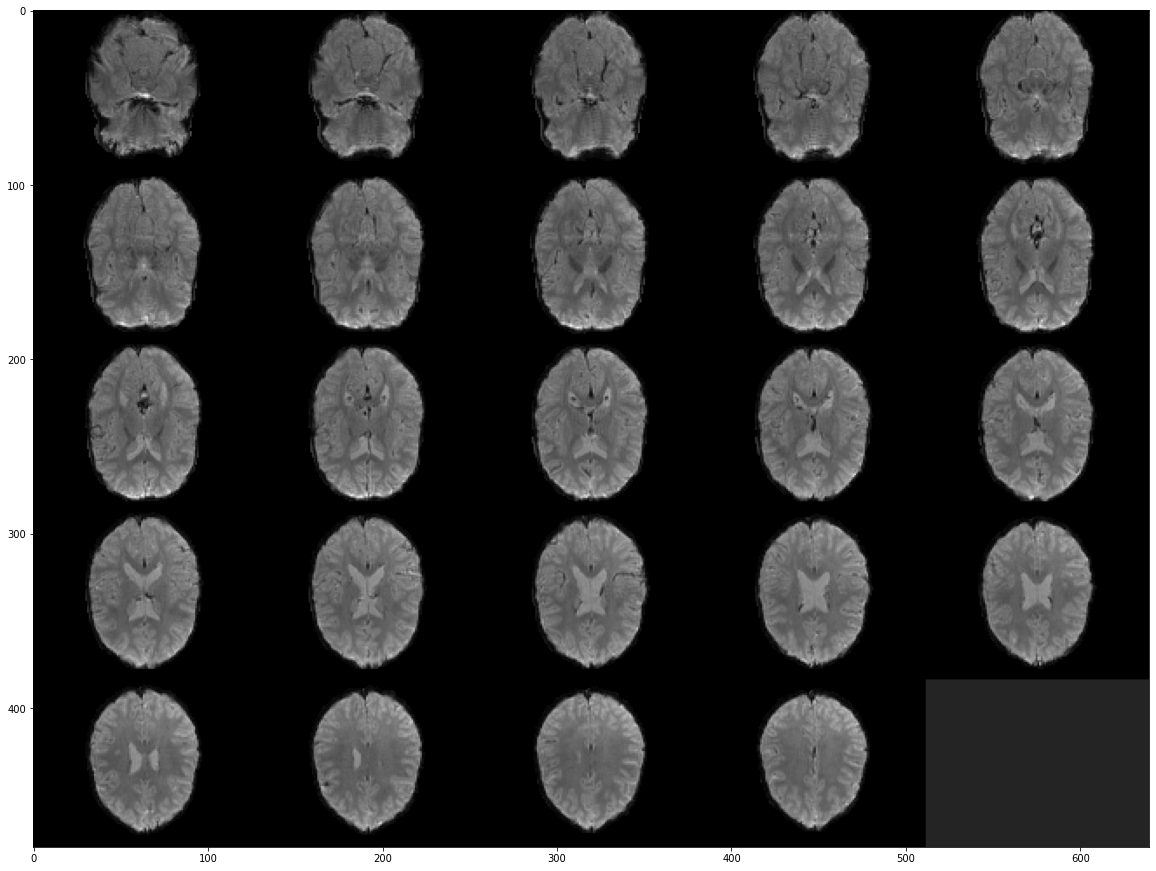
我們可以使用 scikit-image 的 montage 將 3D 影像的每個切面抽出來,拼成一大張影像。使用前要先安裝 scikit-image 模組:
# 安裝 scikit-image 模組
pip install scikit-image
以下是顯示 3D 影像所有切面的範例:
from skimage.util import montage

# 顯示所有切面
fig, ax = plt.subplots(1, 1, figsize = (20, 20))
ax.imshow(montage(n1_img_arr[0]), cmap ='gray')