介紹如何在 Ubuntu Linux 中使用最基本的 HAPI FHIR 伺服器,進行醫療資訊的交換。
首先安裝基本的 JDK 與 Maven 開發工具,JDK 的版本要在 8 以上:
# 安裝 JDK 與 Maven
sudo apt install default-jdk maven
從 hapi-fhir-jpaserver-starter 專案的 GitHub 網頁下載最新的原始碼:
# 下載 hapi-fhir-jpaserver-starter 原始碼
git clone https://github.com/hapifhir/hapi-fhir-jpaserver-starter.git
hapi-fhir-jpaserver-starter 預設會使用 H2 Java 資料庫,所以可以直接執行使用:
# 執行 HAPI-FHIR Starter 伺服器
cd hapi-fhir-jpaserver-starter/
mvn jetty:run
執行 HAPI-FHIR Starter 伺服器之後,開啟機器的 8080 連接埠就可以看到 HAPI-FHIR Starter 伺服器的畫面了。
架設好 FHIR 伺服器之後,就可以利用 FHIR 的協定進行操作。
若要將一筆 Patient 資料新增至 FHIR 伺服器,可以使用 curl 以 POST 的方式送出 JSON 格式的 Patient 資料,並將 Content-Type 指定為 application/fhir+json:
# 新增一筆 Patient 資料
curl -v -X POST --header 'Content-Type: application/fhir+json' --data '{
  "resourceType": "Patient",
  "identifier": [ {
      "system": "urn:oid:1.2.36.146.125.789.0.1",
      "value": "12345"
  } ],
  "name": [ {
      "family": "Chalmers",
      "given": [ "Peter", "James" ]
  } ],
  "gender": "male",
  "birthDate": "1987-12-25"
}' http://localhost:8080/fhir/Patient
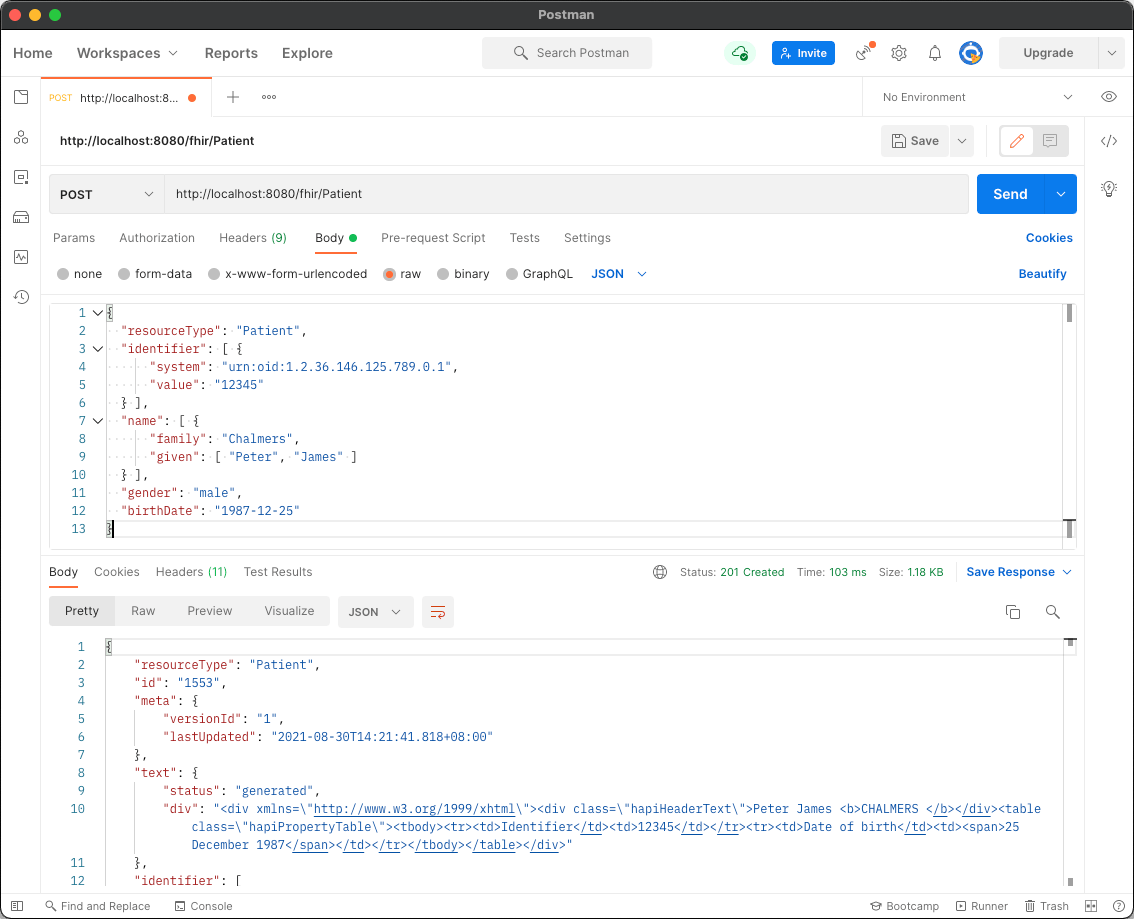
也可以使用 Postman 來進行測試,送出的 JSON 資料以及 Content-Type 的設定都與上面 curl 的範例相同:
查詢所有的 Patient 資料:
# 查詢所有的 Patient 資料
curl -v http://localhost:8080/fhir/Patient
查詢 family name 欄位包含 Chalmers 的 Patient 資料:
# 查詢 family name 包含 Chalmers 的 Patient 資料
curl -v http://localhost:8080/fhir/Patient?family=Chalmers
查詢 id 為 1553 的 Patient 資料:
# 查詢 id 為 1553 的 Patient 資料
curl -v http://localhost:8080/fhir/Patient/1553
若要更新既有的 Patient 資料,可以使用 PUT 送出包含 id 的 Patient 資料:
# 更新一筆 Patient 資料
curl -v -X PUT --header 'Content-Type: application/fhir+json' --data '{
  "resourceType": "Patient",
  "id": "1553",
  "identifier": [ {
      "system": "urn:oid:1.2.36.146.125.789.0.1",
      "value": "12345"
  } ],
  "name": [ {
      "family": "Chalmers",
      "given": [ "Peter", "James" ]
  } ],
  "gender": "male",
  "birthDate": "1987-12-25",
  "address": [ {
      "line": [ "534 Erewhon St" ],
      "city": "PleasantVille",
      "state": "Vic",
      "postalCode": "3999"
  } ]
}' http://localhost:8080/fhir/Patient/1553
FHIR 伺服器會自動儲存資料的歷史記錄,我們可以用以下指令查詢 id 為 1553 的 Patient 資料歷史記錄:
# 查詢 id 為 1553 的 Patient 資料歷史記錄
curl -v http://localhost:8080/fhir/Patient/1553/_history
以下指令可以查詢指定版本的 Patient 資料:
# 查詢 id 為 1553 的 Patient 資料(第 1 版)
curl -v http://localhost:8080/fhir/Patient/1553/_history/1

# 查詢 id 為 1553 的 Patient 資料(第 2 版)
curl -v http://localhost:8080/fhir/Patient/1553/_history/2
若要對一筆 Patient 資料進行補丁(只修改部分欄位的資料,其餘資料維持不變),可以使用 PATCH 的方式:
# 對一筆 Patient 資料進行補丁
curl -v -X PATCH --header 'Content-Type: application/json-patch+json' --data '[
 {
   "op": "replace",
   "path": "/address/0/postalCode",
   "value": "M5C 2X8"
 },
 {
   "op": "replace",
   "path": "/birthDate",
   "value": "1974-02-13"
 }
]' http://localhost:8080/fhir/Patient/1553
若要刪除 Patient 資料,可以使用 DELETE 並指定 Patient 的 URL:
# 刪除一筆 Patient 資料
curl -v -X DELETE https://localhost:8080/fhir/Patient/1553