介紹如何在 Windows 10 中使用微軟的 Visual Studio 2019 編譯 VTK 結合 Qt 的視窗應用程式,以及後續的包裝與布署。
VTK 是一套 3D 視覺化工具函式庫,而 Qt 則是一套 C++ 視窗程式設計框架,以下介紹如何在 Windows 10 系統上,使用 MSVC 2019 來編譯 VTK/Qt 的應用程式。
本篇實測的環境與版本如下:
- Visual Studio 2019 16.4 社群版
- CMake 3.17.0-rc3 版
- VTK 8.2.0 版
- Qt 5.14.1 版
安裝 Visual Studio 2019
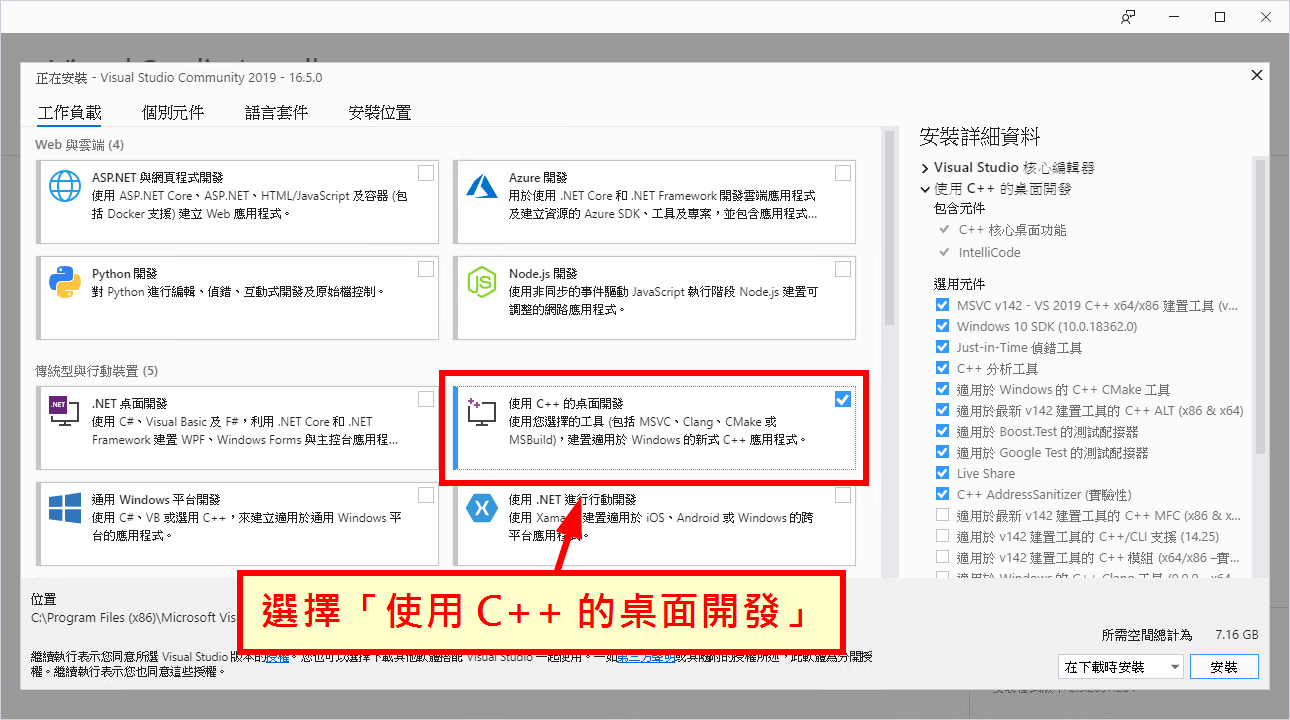
從 Visual Studio 網站下載 Visual Studio 社群版,安裝時選擇「使用 C++ 的桌面開發」套件。
安裝 CMake
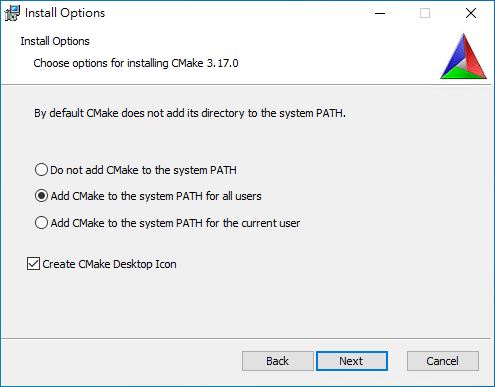
從 CMake 官方網站下載最新版的 CMake 安裝檔來安裝,如果習慣用指令操作的人,安裝時可以將 cmake 加入系統 PATH。另外亦可選擇是否要建立桌面捷徑。
安裝 Qt
從 Qt 的官方網站下載開放原始碼(open source)版本的 Qt 來安裝,安裝前要先用 Email 註冊一個帳號,經過 Email 信箱認證後才能開始安裝。

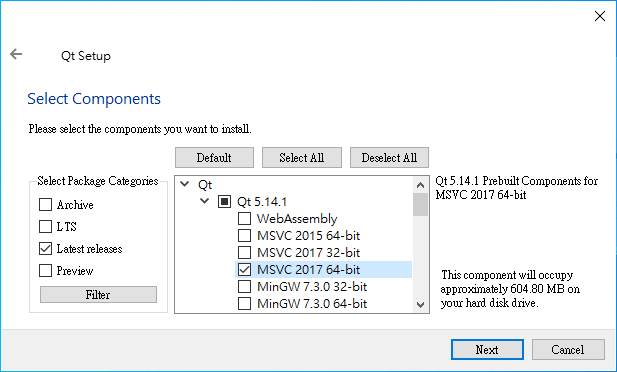
選擇安裝元件時,除了預設的基本 Qt 工具之外,再選擇最新版的 Qt 函式庫,若要以 MSVC 2019 來編譯 VTK/Qt 的應用程式,通常只需要選擇「MSVC 2017 64-bit」即可,其餘沒用到的元件就可以不要勾選,以減少磁碟用量,也可以加快安裝速度。
編譯 VTK 函式庫
Step 1
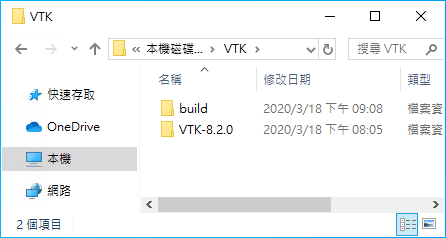
從 VTK 官方網站下載最新的 VTK 的原始碼(這裡以 VTK-8.2.0 作為示範),將原始碼解壓縮之後放在 C:VTKVTK-8.2.0 目錄,然後建立一個 C:VTKbuild 目錄放置編譯產生的檔案。
Step 2
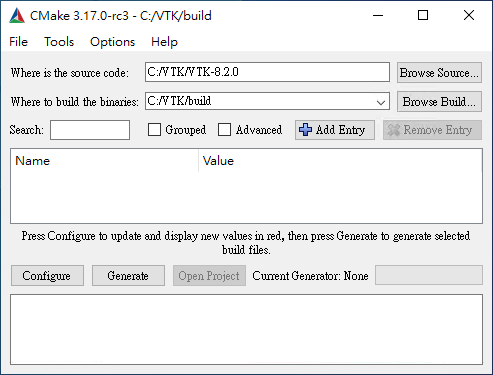
打開視窗介面的 CMake,將原始碼目錄(source code)指定為 C:VTKVTK-8.2.0,建置(build)目錄指定為 C:VTKbuild,然後按下「Configure」按鈕。
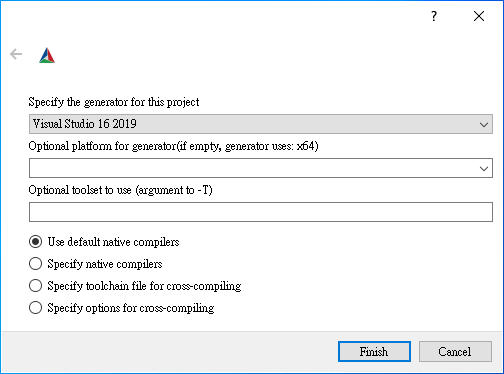
選擇對應的編譯環境,這裡我們使用 MSVC 2019,所以就選擇「Visual Studio 16 2019」。
Step 4
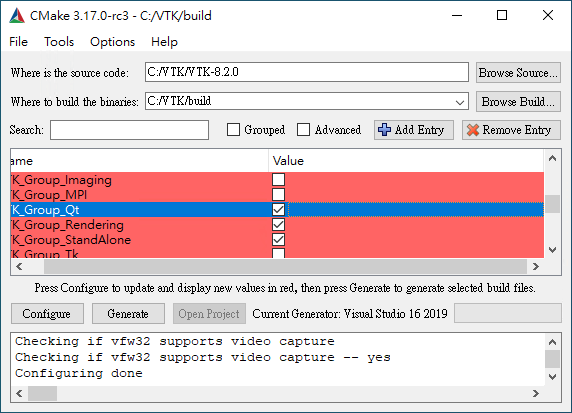
勾選「K_Group_Qt」這個 Qt 群組,然後再按下「Configure」重新進行設定。
Step 5
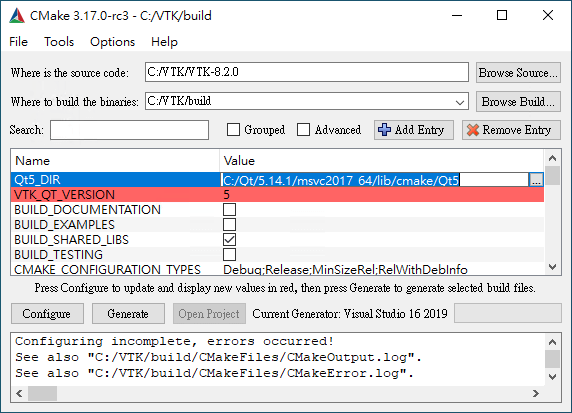
如果 CMake 沒有自動找到 Qt 函式庫的位置,Qt5_DIR 就會出現 Qt5_DIR-NOTFOUND,這時候就要手動指定 Qt 函式庫的位置。
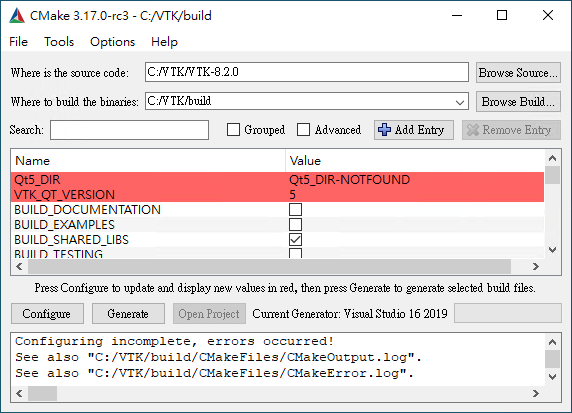
手動指定 Qt5 函式庫的位置為 C:Qt5.14.1msvc2017_64libcmakeQt5(如果自己的安裝路徑不同,則自行更改),然後再按下「Configure」重新進行設定。
Step 6
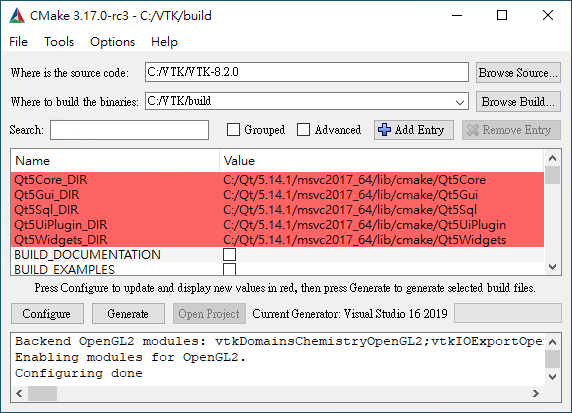
確認完全沒有錯誤之後,按下「Generate」產生 MSVC 的專案。
Step 7
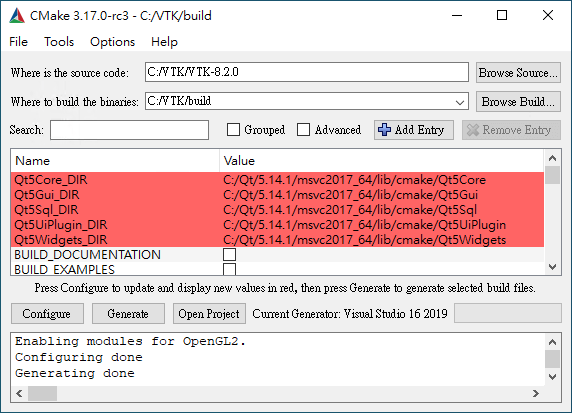
這樣就完成建立 MSVC 專案的步驟了,產生的 VTK 專案會放在 build 目錄中。
Step 8
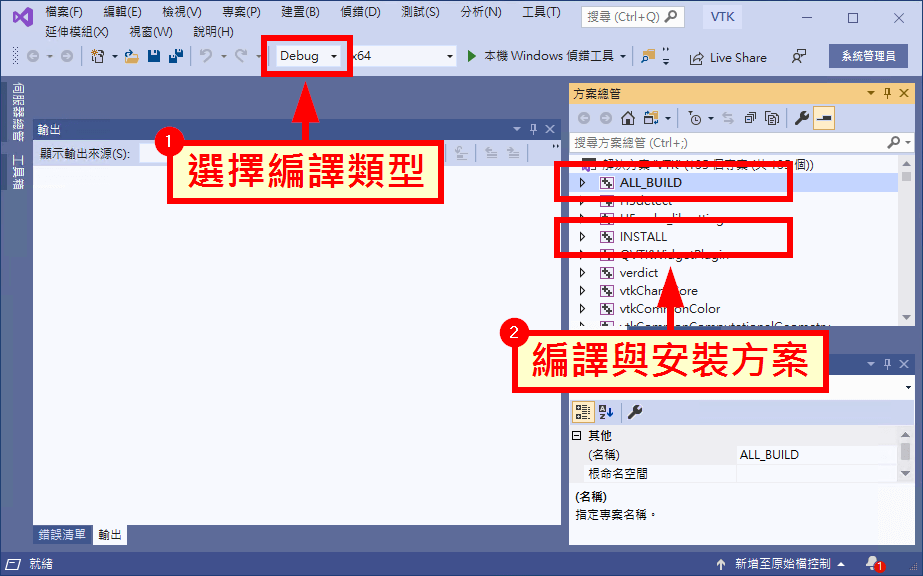
以 MSVC 開啟 build 目錄中的 VTK.sln 專案之後,選擇編譯的類型,然後在 ALL_BUILD 方案上按下滑鼠右鍵、選擇「建置」,即可自動編譯整個 VTK 專案。
Step 9
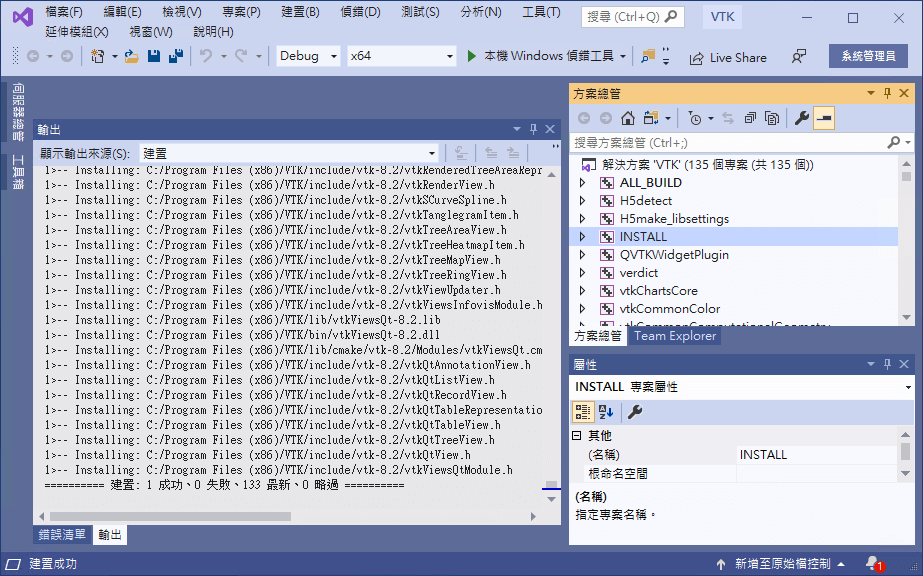
編譯完成之後,確認沒有失敗的方案,即可在右方 INSTALL 方案上按下滑鼠右鍵,選擇「建置」以安裝 VTK 函式庫。
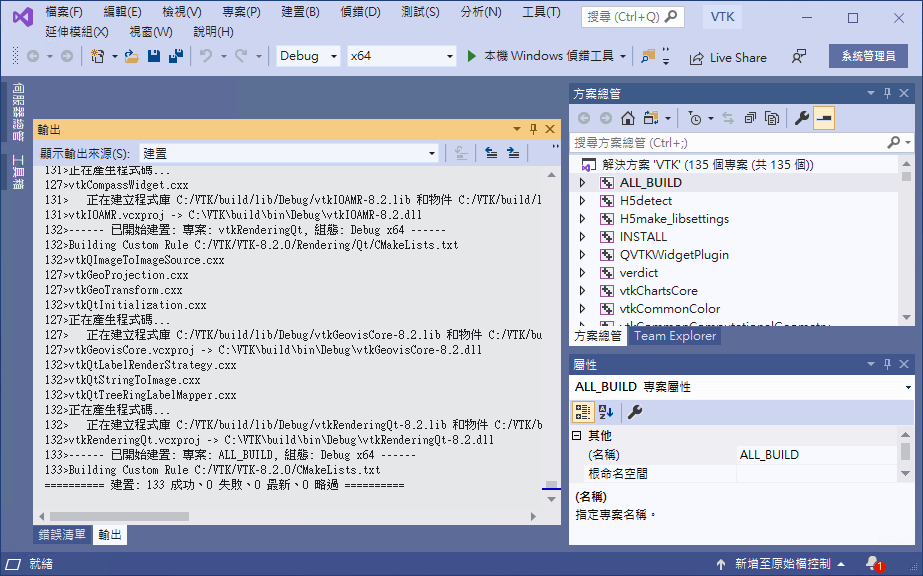
Step 10
若沒有出現錯誤,這樣就完成 VTK 函式庫的安裝了。
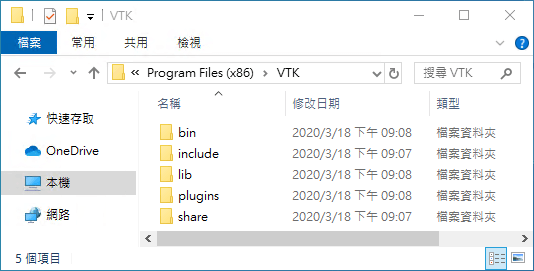
預設的 VTK 函式庫安裝路徑位於 C:Program Files (x86)VTK。
編譯 VTK/Qt 應用程式
Step 1
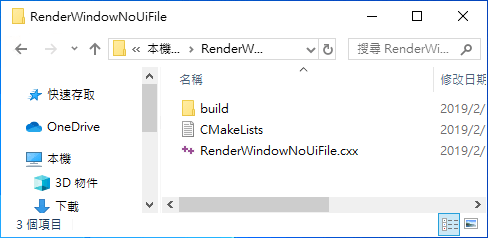
從 VTK 範例網站下載 RenderWindowNoUiFile 這個 VTK/Qt 範例程式(含有 C++ 的程式碼以及 CMakeLists.txt 設定檔),將原始碼放置在 C:RenderWindowNoUiFile 目錄,另外建立一個 C:RenderWindowNoUiFilebuild 目錄放置編譯產生的檔案。
Step 2
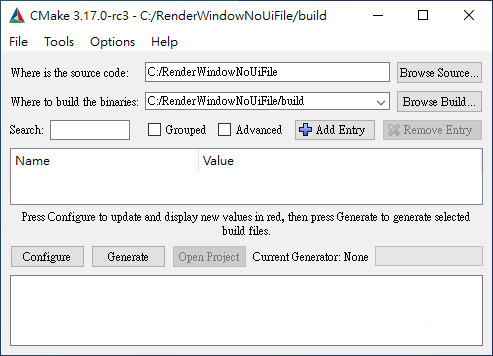
開啟 CMake 視窗介面,設定好原始碼與建置目錄,按下「Configure」按鈕。
Step 3
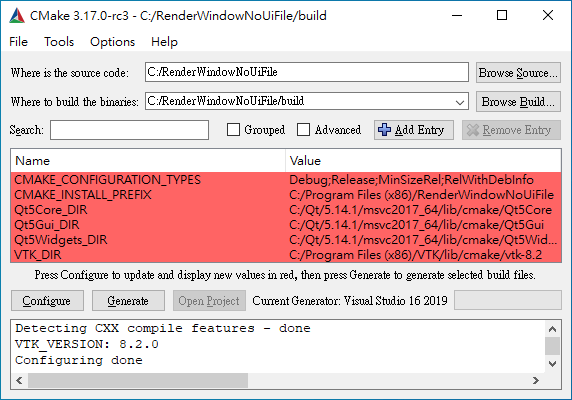
確認沒有錯誤後,按下「Generate」產生 MSVC 專案。
Step 4
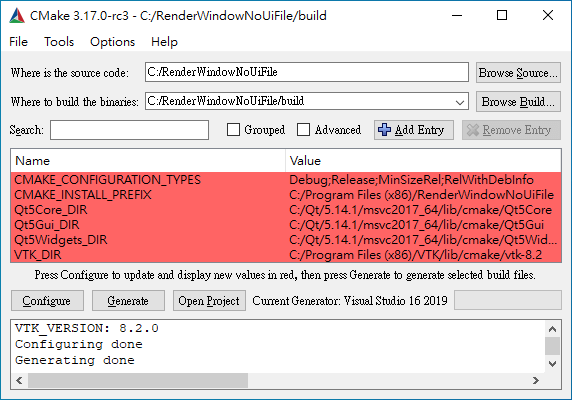
確認沒有錯誤,這樣就完成產生 MSVC 專案的步驟。
Step 5
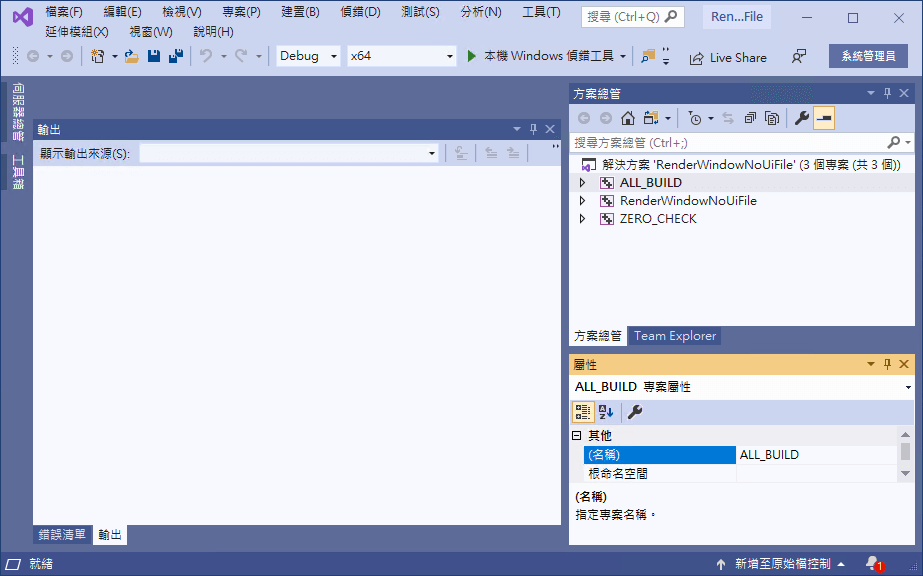
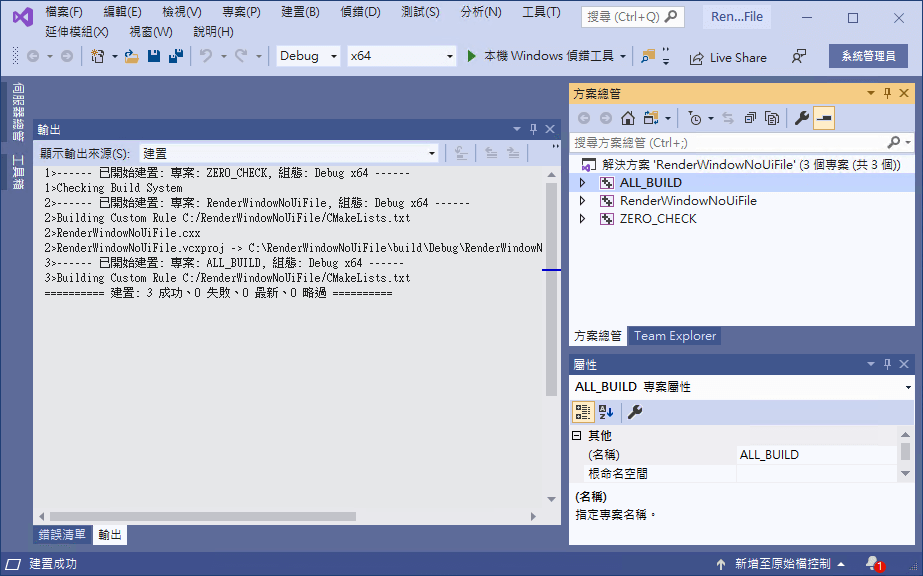
打開 build 目錄下的 MSVC 專案,使用右方的 ALL_BUILD 編譯整個專案。
Step 6
確認編譯有成功,這樣就完成了。
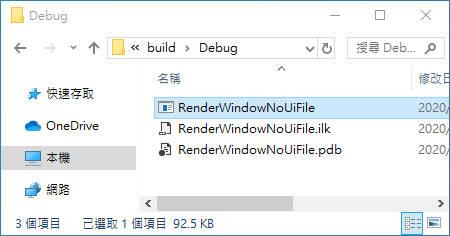
若在 Debug 編譯類型之下編譯,完成的執行檔會存放在 build/Debug 目錄。
Step 7
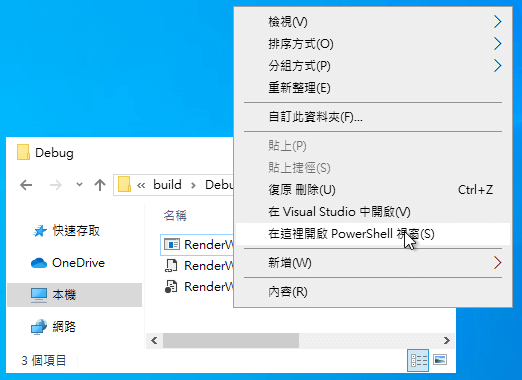
在此目錄按下 Shift 加上滑鼠右鍵,開啟 PowerShell 視窗。
Step 8
在 PowerShell 中設定臨時用的 Path 環境變數:
# 新增 Qt 至 Path 搜尋路徑
$env:Path += ";C:Qt5.14.1msvc2017_64bin"

# 新增 VTK 至 Path 搜尋路徑
$env:Path += ";C:Program Files (x86)VTKbin"

# 檢視 Path 搜尋路徑
echo $env:Path
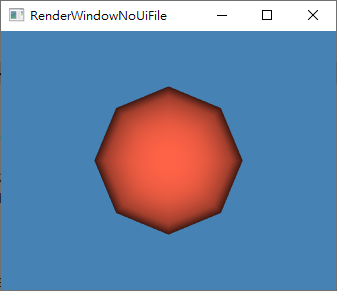
然後再執行編譯出來的執行檔,這樣就可以正常執行了。

執行的結果會像這樣:
若沒有設定好適當的 Path 環境變數,就會出現類似這樣找不到 dll 檔案的錯誤訊息,解決方式就是找一下該 dll 放在哪個位置,將該位置加入 Path 中即可。
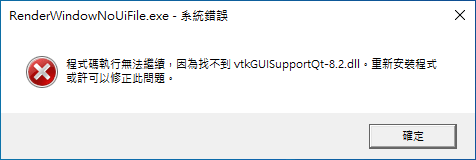
如果確認 Path 的設定都正確之後,也可以直接將這些設定放入系統預設的 Path 之中,以後就不用再次設定。
布署 VTK/Qt 應用程式
若要將 VTK/Qt 專案編譯出來的執行檔放在別的電腦執行,必須將所有相依性檔案(例如 dll 動態連結檔)一起打包起來,這個動作主要會牽涉到 VTK、Qt 與 MSVC 三大類的相依性檔案,Qt 的部分可用 windeployqt.exe 這個 Qt 附帶的工具來自動處理:
# 自動複製所有 Qt 相依性檔案
C:Qt5.14.1msvc2017_64binwindeployqt.exe .RenderWindowNoUiFile.exe
執行 windeployqt.exe 之後會將所有執行該執行檔所需的檔案都複製到該執行檔的所在目錄下。
VTK 的相依性檔案就是 C:Program Files (x86)VTKbin 目錄下的 dll 檔案,最簡單的方式就是把這些 dll 檔案全都複製一分到執行檔所在目錄。
最後 MSVC 的部分可從 C:Program Files (x86)Microsoft Visual Studio2019CommunityVCRedistMSVC14.25.28508 之下將所需的 dll 動態連結檔複製過來(例如 x64Microsoft.VC142.CRT 目錄),或是讓使用者另外安裝該目錄下的 vc_redist.x64.exe 這個 Visual C++ 可轉散發套件(這個檔案也可以從微軟的官方網站下載)。
將所有的相依性檔案都備齊之後,就可以將整個目錄搬到別台電腦使用了,若需要製作打包好的自動安裝檔,建議可以使用 NSIS 這個包裝工具。
在程式開發完成後,在進行包裝與部屬之前,要先把 VTK 與 VTK 應用程式的編譯類型改為 Release 或 MinSizeRel,重新編譯過後再進行封裝與布署,否則執行檔可能會連結至除錯版本的 dll 動態連結檔。
Qt Designer 安装 QVTKWidget 外掛
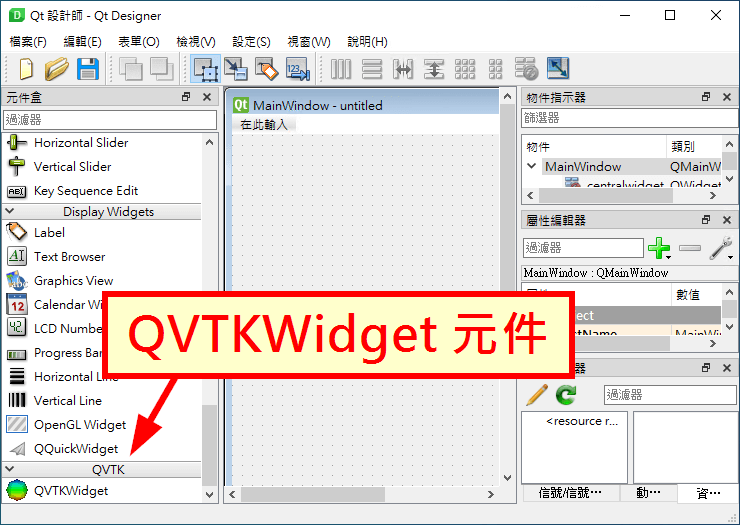
若需要使用 Qt Designer 設計 VTK/Qt 應用程式的視窗介面,可將 VTK 以 Release 或 MinSizeRel 類型編譯之後,將 buildbinRelease 或 buildbinMinSizeRel 目錄中的 QVTKWidgetPlugin.dll 複製到 C:Qt5.14.1msvc2017_64pluginsdesigner 這個 Qt Designer 的外掛目錄之下,然後再開啟 Qt Designer,就可以看到 QVTKWidget 這個元件了。
參考資料:csdn

